

Fail It Yourself: DIY Tie-Dye Acrylic Sweater Or How To Permanently Paint Your Oven
Aren’t you tired of reading about my perfect life, in which all of my DIYs succeed and never fail? Ha-ha, of course you are not! But I still want to show you that I am a real human being and do not live in a fairy-tale land, and sometimes my DIYs do fail. This post opens a new chapter in my blog: Fail It Yourself. In this category I will share with you the stories of my failed DIYs, and hopefully it will help you to avoid my mistakes or maybe you will have a good laugh.
Besides, I could not find much information on the Internet about how to dye acrylic yarn, so this post will be a warning to the crafters: Beware of dying acrylic yarn (and do not tie-dye it).
So yeah, I bought this lovely yellow sweater in a second hand store for almost nothing. I liked the cut and the color, and only at home I found out that it was stained all over the front. I got upset, but decided to take it as a challenge. Remember I saved a stained dress by tie-dyeing it? I decided to revive the sweater using the same approach.
The sweater was made of acrylic yarn, and soon I found out that it is hard to dye acrylic (read this great article How to Dye Acrylic Yarn and Fabric). Natural fibers (cotton, silk, wool) are easy to dye, since you can use a cold method that requires nothing but a bath or even a washer. But acrylic yarn is a tough one, and it can be dyed only using a stove method with a boiling solution. Yep, a perfect recipe for a disaster.
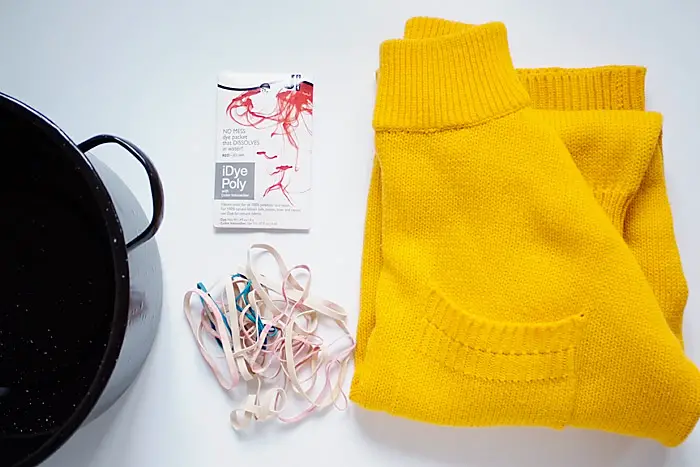
Disaster Recipe Ingredients Or What You Need For This FIY
- a dye for acrylic, I bought Jacquard iDye Poly at Amazon.ca
- an acrylic item, I took a stained second hand sweater
- elastic bands
- an enamel pot
Everything is ready for the adventure.
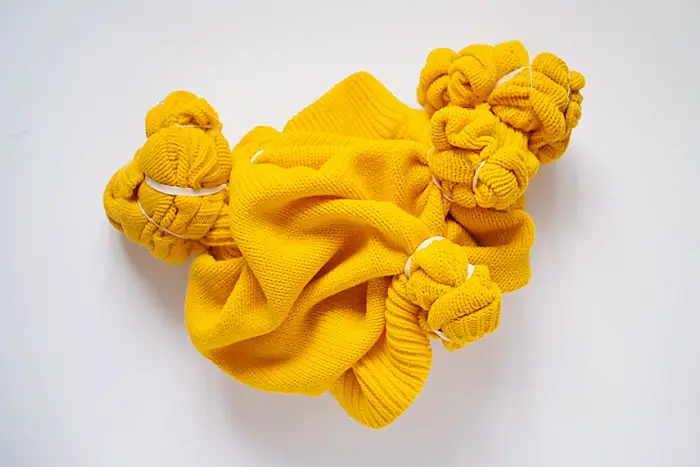
First I tied the sweater with elastic bands (who knew it would be such a mistake!)
Then I followed the instructions on the dye package and put its content in the pot with hot water. The package contained the dye and a stabilizer, and I used both.
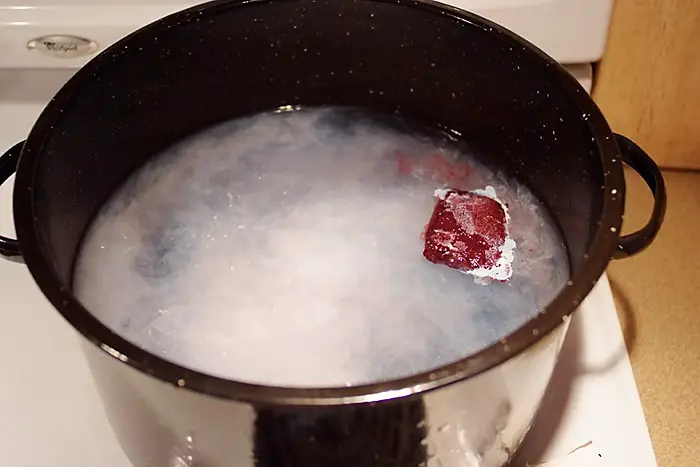
Oh yes! Do not forget to prepare a stick, which you will use to mix your dye solution. I realized I needed one only after putting the dye in the water. Fortunately I had a wooden stick of convenient length of 1,5 m (5 feet), so I used it.
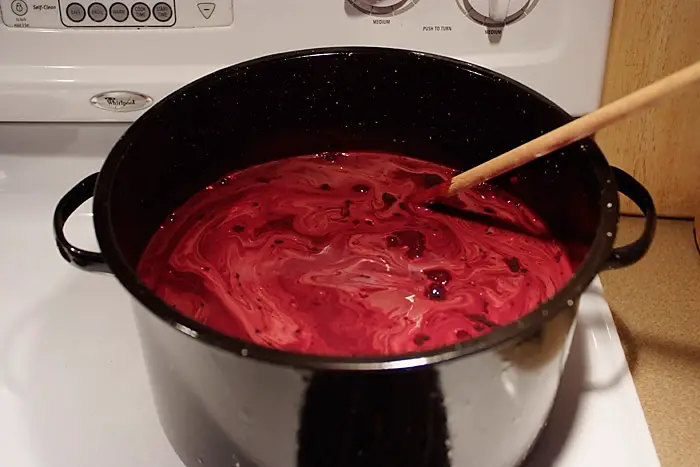
Then I put the sweater in the pot. Looks pretty innocent, doesn’t it? And then the solution started boiling.

After about an hour of inhaling chemical fumes of the boiling solution (I put the kitchen fan on max, but only it helped a little) plus another hour of waiting while the pot was cooling outside in the snow plus a bit more of waiting for the washer to wash the sweater, I got… this. A crumpled dark orange thing that looked like ten cows chewed it for a few hours non-stop. The wrinkles were basically boiled in and took a permanent shape. Yes, tying the sweater was definitely a mistake.

Good enough.. for a garbage bin!
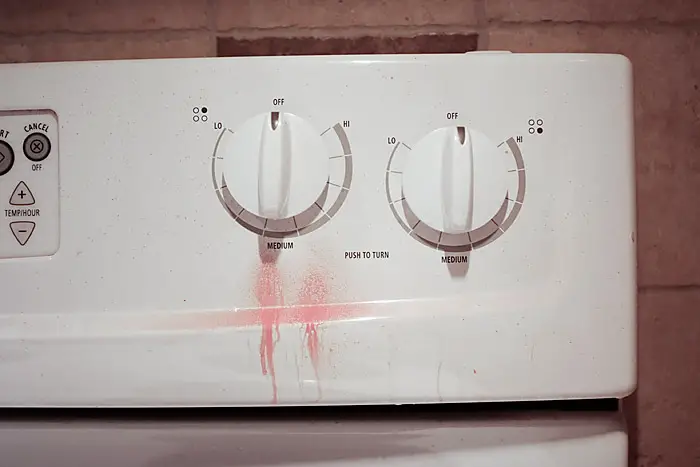
Oven
And the oven. You want to know what happened to the oven. Well, it bled. Permanently. From a knob. During the dying process the oven got covered with paint splashes coming out of the boiling solution. I was constantly wiping them off, but some of the naughty droplets managed to hide behind the pot. They stayed there and penetrated into the finishing coat while drying. Nothing can remove them now. The next day my cleaning lady was in tears, she called me: “Nadya, I spent two hours cleaning the oven, I cannot remove the pink stains!” Yeah, I forgot to warn her. The fabric dye was too good. The stains will stay there forever to remind me of my great dying adventure, about how crazy brave I was.
Fail it yourself!

Disclaimer: Yup, this post may contain affiliate links! If you buy something from me, I get some margarita money (not enough to buy a pair of shoes). Read more here.


nail varnish remover. gets EVERYTHING off – trust me!
Do you want to promote your business on thousands of advertising sites monthly? One tiny investment every month will get you virtually unlimited traffic to your site forever!For more information just visit: http://maximumadposting.hopto.org
This is too funny????. I have that same color dress that I bought from a second hand store as well. I was thinking about dying it red at first but this will be my first time dying something so I will be going with black.
I’ve been there lots of times.. failed DIY’s are my specialty. Even though the tie dye wrinkled the sweater, would you say that the dye worked well and didn’t damage the sweater (besides the rubber band part)? I am dying a 75% acrylic and 25% cotton sweater deep black and RIT dye has failed me! The color is only sticking to the cotton parts of the sweater and it is light gray, barely black. I have dyed over three times and no new results. I am considering to try iDye Poly but im not sure if its worth it…. any advice?
Don’t you need the synthetic kind for acrylics?
Hihi, thanks for sharing. You can’t get it right all the time 😉
You are welcome 🙂 You are absolutely right, once is a while it must fail 🙂
Ha, ha, ha- you made me laugh out loud! I know that feeling very well, making a post about is a pretty cool idea 😉
Tutti, I am very happy you liked it 🙂 I felt I had to share my new knowledge with the rest of the world!
BTW, many people told me that the sweater is not as bad as I think it is, but I still have hard time wearing it 🙂
loool you made my day 🙂 Thanks for sharing that no one and nothing always is perfect 😉 the funny thing is, that the swaeter looks like a super spacy designer thing 😀 Best Regards Nephtyis
aww, Nephtyis, glad you liked it! It is especially pleasant to read such comment from a designer 🙂
Yeah, now, after some time has passed I kinda agree that the sweater does not THAT bad. But the look I imagined before doing it was soo different from what I got in the end! Yeah 🙂 Now I think I may actually start wearing it hehe
Oh nooo haha! It looked so cool before, I thought: Wow she tried that with some designer brand sweater, but it was a vintage bargain 🙂 My DIYs rarely work, I know how annoying that is!
And about your question: Bangkok is SO exciting, I’m here for a 3 month long internship and will soon write a post about it 🙂
Malin, thanks for stopping by 🙂 Looking forward to read your first Bangkok post!
Ouch too bad for your oven…but the sweater don’t even look like a failed DIY, ha ha xD
xoxo,
http:/www.kadi-lv.com
Kadi, you are very nice 🙂 I am just not sure the upcycled sweater fits my style/taste 🙂 But I am sure I expected a very different result. a friend of mine suggests to wrinkle it even more! Maybe I will follow her advice! As of the oven… I should do more dying while using various hues, so in the end it would look like a piece of art haha
Oooh i like it!!
My Showroom
Haha! Good 🙂 I am just not sure it is my style 🙂 But I am sure I expected a very different result 🙂
Then buy it from her. It’s on sale.