
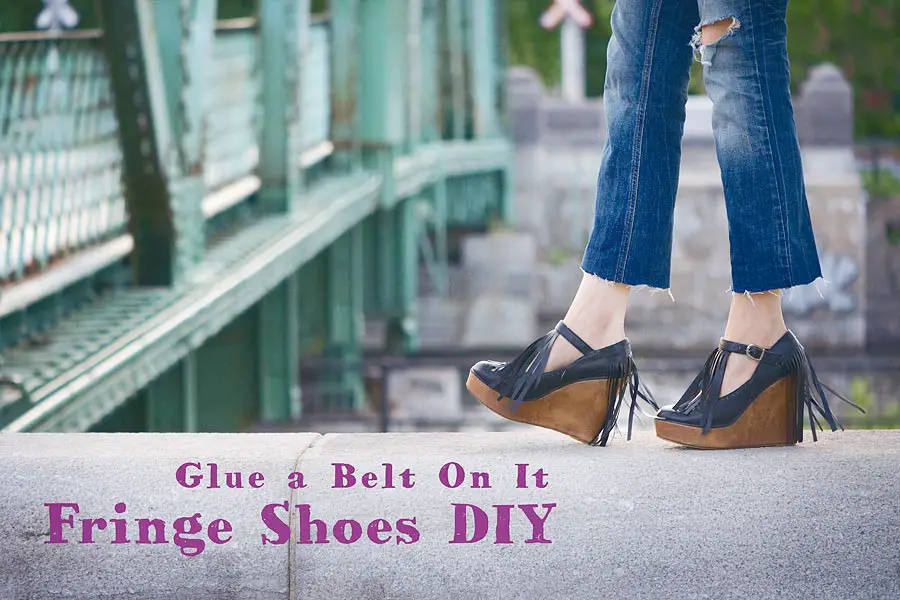
Fringe Shoes DIY: How I Almost Destroyed My Shoes Using an Old Belt And Some Glue
I have probably annoyed you to death by talking about fringe all the time (this is the 6th post about fringe). True, I am obsessed, and I cannot help it! But I promise that my therapist and I will handle it and this one will be the last fringe post (for a month or two 😉 ). So, enjoy this fringe shoes DIY! Or should I say FIY?..
BTW, for this DIY I got inspired by these cuties:
Contents
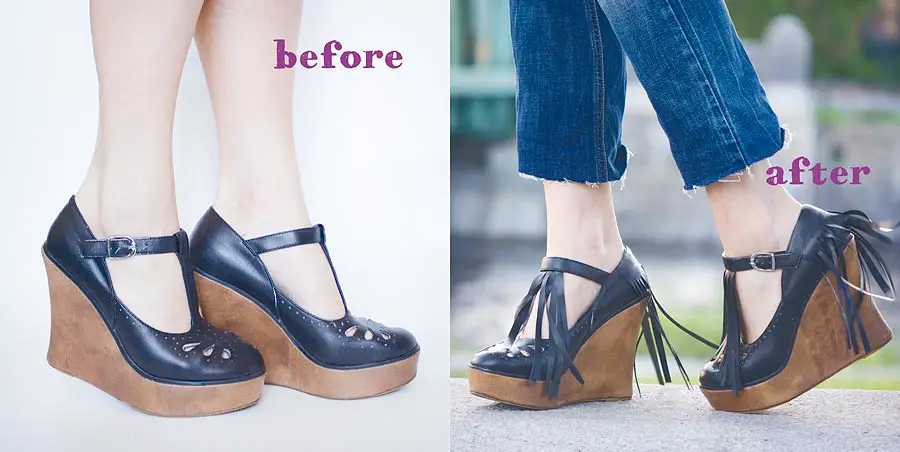
What Does a Belt Have To Do With All It?
But first let’s talk about the belt part. You may have been wondering: Why a belt? What does a belt have anything to do with it?
Well, the belt was used to make the fringe!
I remember how easy it was to make a fringe out of the cuffs in my pleather fringe jacket DIY. The pleather was easy to work with, and the fringe looked nice. So, I thought – what could replace the cuffs? Maybe a belt, a thin but wide one? You know, that kind of belt that has a buckle and no holes and is perfect to wear with a dress or a blouse. It is usually thin and wide, and it makes it perfect for a fringe!
So, I got one (well, I got a few – because as you remember I am obsessed with fringe! – but ended up using only one) at a second hand store for $3. It worked well!
Do It Yourself Or.. Fail It Yourself?
In fact this DIY could have been easily a FIY (fail it yourself). Several things went wrong.
First of all, I almost destroyed one of the fringes by a gentle move of my… not, not hand, but knee. I stepped on the fringe with my knee and somehow twisted and pulled it, and a chunk of the fringe came off. Getting really creative in tearing things! I attached the piece back using a duct tape.
The glue I used in the DIY was all wrong. It was way too thick and inconvenient to use in craft projects. It’s like using a canon to knock down apples.
I had hard time applying it in a thin layer, so I ended up with an uneven surface that looked like pimples on a teenager’s forehead. Ugly!
Then I had to wait for 15 min before attaching the pieces together. So, each gluing session was taking me a quarter of an hour to do, and I had quite a few of them. Not mentioning that in the end I started forgetting which pieces were due to be attached where!
You may ask why I used this one instead of a regular craft glue? Well, in the beginning I only remembered I had this glue while totally forgetting I had the proper one! Eventually I recalled, but it was too late. While approaching the end of the DIY and my mental sanity, I got a sudden memory flashback: me standing in the very same room and holding a craft glue tube in the very same hand. But as I said it was too late: The fringe was already glued on.
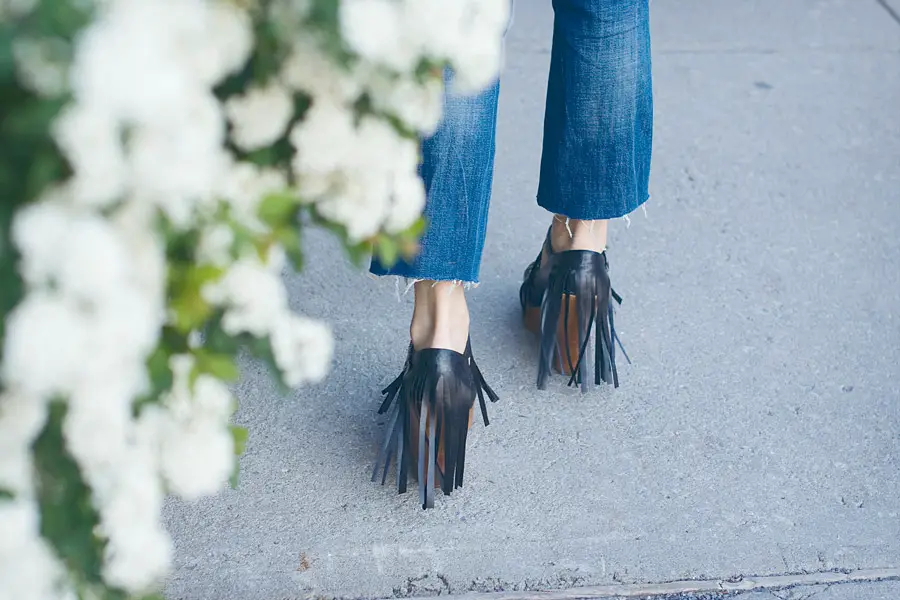
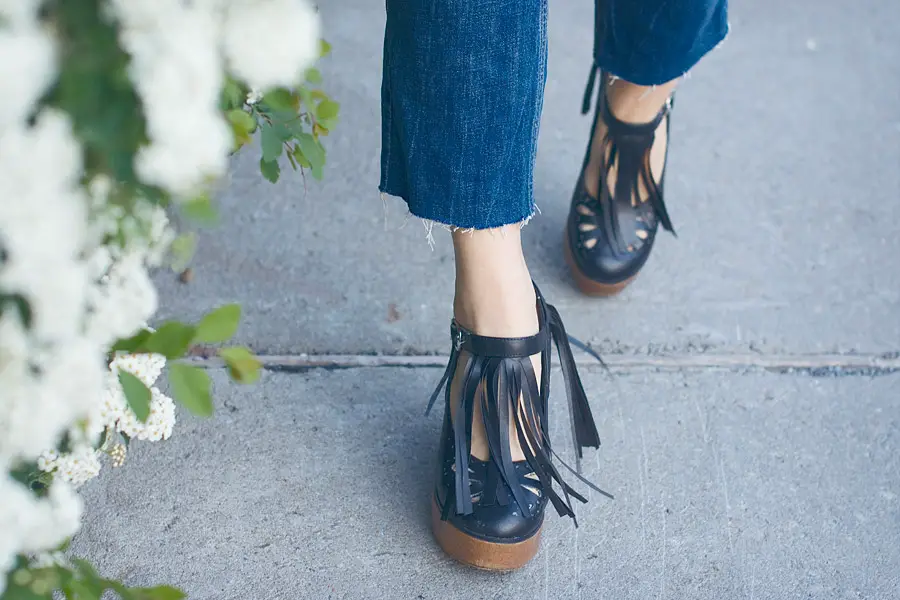
Gluing the fringe to the correct place did not go well either. I mis-calculated the position of the front fringe and put it quite sideways. Instead of freely fluttering in the wind in the middle of the strap, the fringe got crooked on the left side of my foot. It looked like a hairy animal holding my feet tightly in a desperate attempt to avoid getting kicked off. Or maybe it looked like a fluffy alien who had landed on my feet by accident and was now trying to understand whether it was a proper landing spot or it should choose a different location. Other way or another, the fringe looked super weird.
So, I had to tear it from the strap and re-glue. Remember, I used a super strong industrial cement glue, so the task looked like a mission impossible. I prepared myself for yet another annoying round of fringe measuring and cutting to replace the damaged stripe, but surprisingly the fringe survived! I sang it an small ode praising its strength and survival skills (and I think it smiled back to me).
As you see many things went wrong during the DIY. However, I was very committed to finish it in a proper manner. And I did. And that’s why I made a regular DIY instead of a FIY… and I kinda regret it now 🙂 I do know you like FIY better, and I like to write about it. It is funny. Maybe I will do it next time! I own you a good laughter 🙂
Fringe Shoes DIY Steps
If you want to repeat my experience, here are the steps for you!
Fringe Shoes DIY Instructions
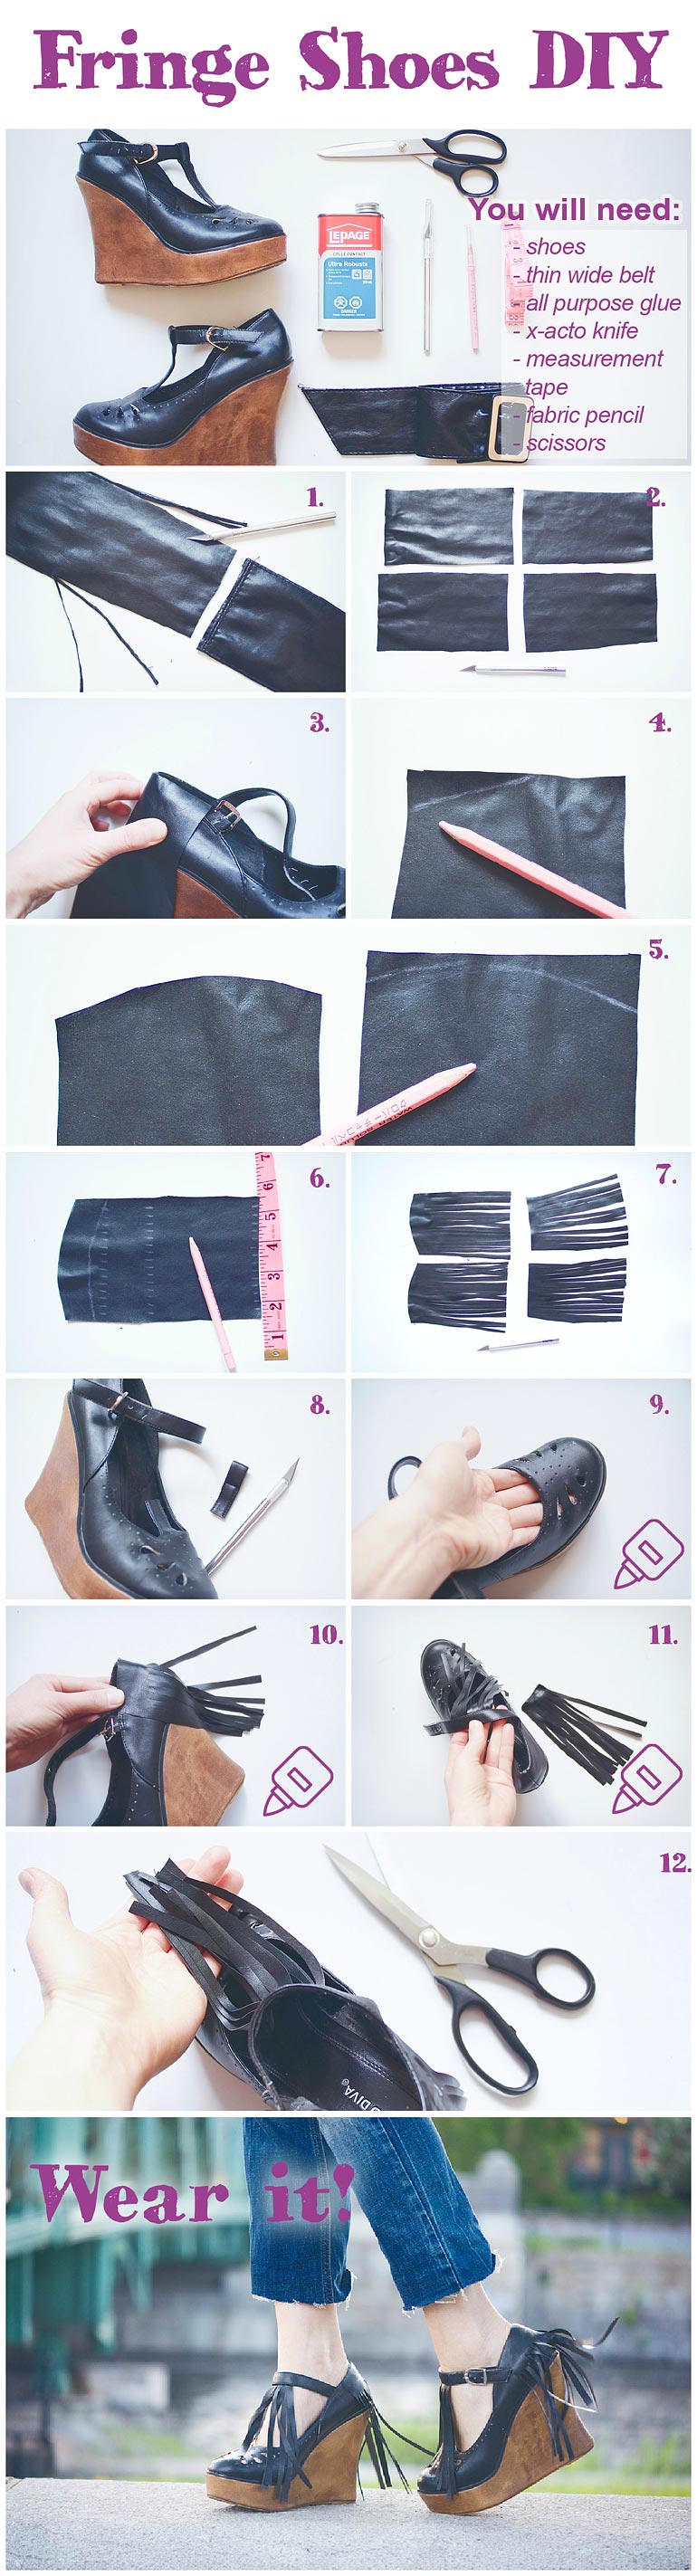
For this Fringe Shoes DIY you will need:
- a pair of old shoes, preferably heels or wedges;
- a thin wide belt made of leather or pleather; the wider it is the merrier;
- craft glue; I used a heavy duty cement glue, because it was the only glue I remembered I had;
do not make my mistake and use a friendly craft glue instead! Like E600 for example; - an x-acto knife – it is my dear friend and colleague for all leather DIYs;
- a measurement tape or ruler (yep, I also forgot I had the ruler, it would have been much more convenient to use it instead of the tape);
- a fabric pencil;
- scissors.
DIY Cost (materials):
- second hand shoes: $5.5
- second hand belt: $3
Total: $8.5
DIY steps:
- chop the belt into pieces using the x-acto knife and cut off all the seams and stitching;
- you will need two pairs of similar pleather pieces: two for the back fringe and two for the front;
- the top side of the back fringe has to be curved;
so apply one of the pieces to the back of the shoe to see how much curving is needed; - mark the curve with a fabric pencil;
- using this piece as a pattern, mark up the other piece from the pair;
- using a measurement tape mark the fringe stripes; I made the stripes 1/4′ (4 mm) wide;
- cut the piece along the marks using x-acto knife;
repeat the previous steps with three other pieces – note that the pieces for the front fringe (on the right) do not require the curved top; - chop off the vertical strap from the shoes leaving some of it to fold inside;
- fold the strap leftover in the shoe and glue it inside;
- glue the back fringe to the back of the shoes;
- glue the front fringe to the, obviously, front part of the top strap where the vertical strap used to be;
I folded it in two before gluing it; - trim the attached fringe using scissors;
- wear it!
Happy DIY-ing!
Disclaimer: Yup, this post may contain affiliate links! If you buy something from me, I get some margarita money (not enough to buy a pair of shoes). Read more here.


What the great idea ..
Thanks Lida!
keep going I like to read it ..
Michelle – merci-merci!
Cute!
OMG Nadya that sounds so terrible, I get really frustrated when things don’t come out as I see them in my head, and thinking that you went though all of that i can only imagine the frustration! To tell you the truth I scroll down before reading the post and if it wasn’t because you mention the crazy journey you went through I would never notice any of it, so I guess you did an awesome job finishing the DIY!! hahah HUGS
aww, thanks so much for the kind words 🙂 kisses! I also get frustrated in this kind of situations, but it somehow motivates me to go on. Though in this case I wish I would stop and show the failed result 🙂
Thanks for the wonderful inspiration! The fringe shoes are so cute 🙂
xx from Germany/Bavaria, Rena
http://www.dressedwithsoul.com
aww, thank you so much, Rena! Glad you stopped by and read my post 🙂
Marina de Rive-Sud – спасииииибо :-***
Maude awwwwww, thanks!!! Yeah, I do hope my experience will be useful for somebody!
That is super cute! Love the fringe! You did such a good job. It’s like getting a new pair of shoes! Your pictures and tutorial were fantastic. Well done! 🙂 Enjoy your day! Koko
Koko, thanks so much! Soo glad you liked it! You too have a gorgeous day!
The shoes were cute before, but they’re even cuter with the fringes! I will however pass on this project as i’m pretty sure it’s a FIY for me. :))
hey, Andreea, thanks for the nice comment 🙂 This DIY is indeed a bit challenging! But I had some fun time after while taking the pictures of the result 🙂
Надя, респект и восторг!
Very cute! And thank you for including the almost FIY… it’s good to share your mistakes so that other people can hopefully avoid them!