Off-The-Shoulder Top DIY: Perfect Way to Fix Resting Bitch Face
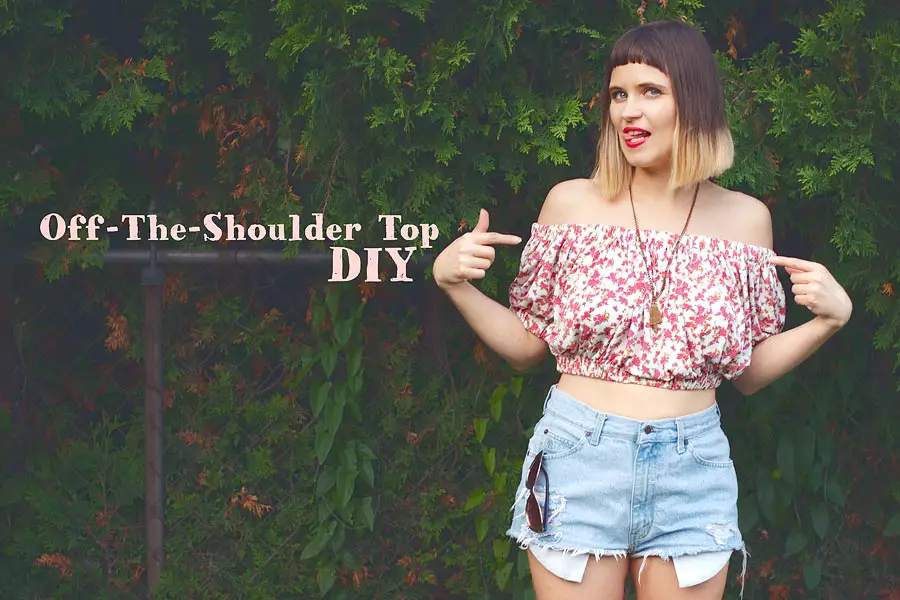
You see that picture above? That’s an off-the-shoulder top I sewed myself!
Recently I went to a sample sale made by a local designer and bought some fabric. It is nice stretchy fabric with a pretty pastoral flower pattern; maybe a bit too girly for my taste, but why not try it once in a while. I decided to use it to make a real top sewn from scratch. In my previous post I talked about the-off-shoulder top summer trend, and this top was inspired by a Mochi top from one of the summer outfits by Man Repeller:
Before showing how I made said top, let’s first look at how I posed in it… and at the resting bitch face I made!
Contents
Resting Bitch-Face And How I Fixed It
While doing the photo shoot, I totally forgot I got a new cute off-the-shoulder top. Result: resting bitch face.
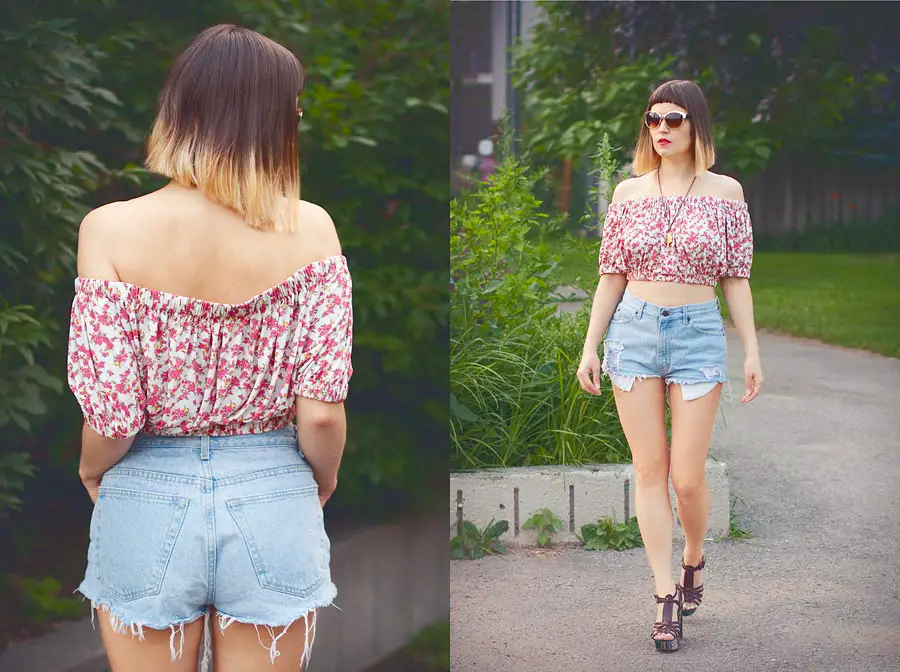
Here I look like one step away from being a human Grumpy Cat.

If you have no idea what resting bitch face is, read the description on Urban Dictionary:
resting bitch facea person, usually a girl, who naturally looks mean when her face is expressionless, without meaning to.
It can happen to everyone. You walk along the office corridor thinking about what you will cook for supper, and all of the sudden a colleague of yours comes to you and exclaims: “Oh, what happened?! Why are you upset?!” And you are like “Whaaat?..” And then you remember: “Ah, that’s JUST MY FACE,” so you come up with some dump explanation to calm your colleague down. It happens to me all the time. No, I do smile. And I do laugh. A lot. But when I am relaxing or getting submerged into my deep thoughts, the best face of the world (the resting bitch one) pops in and just sits there.
So yes, I was posing with a total bitch face… And then in the middle of the photo shoot, I remembered! I got a new cute off-the-shoulder top! My RBF disappeared, and got replaced by… what is this? Girl-playing-soccer face? The imaginary ball was approaching towards me, and I was like: “Yes, give it to me! I can totally kick it back! Yes, while wearing these uncomfortable looking heels! And keeping my hands in the pockets!”

After missing the ball, it was time to rest on the grass and twirl and smile. Because I remembered: I got a new cute off-the-shoulder top.
So, my recipe to fix the RBF is to make a fun top and to roll on the grass to celebrate.

How To Get The Look
This look is easy-peasy. I made a bet on a winning combination with a bit of sexiness: top + shorts+ heels. So office-unfriendly, but so summer-friendly! As for the accessories I chose a pair of cat-eye shaped sunglasses (one of the summer trends in the world of sunnies) + a fun middle finger pendant I got long time from one of Montreal designers (the designer does not do them anymore alas).

Off-The-Shoulder Top DIY Steps
So, if you want to make a top for yourself, follow my simple instructions. Required: sewing skills just a bit above “oh I don’t sew”.
Making this top is easy, but I had hard time describing the steps. I guess it is because all the top parts are rectangles, and it is hard to understand from the picture which exactly rectangle is used in a step. That’s why this DIY steps’ picture has text 🙂 To make it even easier, I created an off-the-shoulder top pattern – you can see it below the DIY steps.

Off-The-Shoulder Top DIY Steps
DIY Steps:
- DIY supplies you will need:
- light fabric that drapes nicely, about 4′ of 60” wide fabric (calculated for 36” bust size);
I took thin stretchy fabric; - elastic band 1” wide, about 7.5′ (calculated for 36” bust size);
- scissors;
- pins;
- a measuring tape;
- thread;
- a sewing machine;
- a big safety pin (not pictured)
- light fabric that drapes nicely, about 4′ of 60” wide fabric (calculated for 36” bust size);
- Measure the length of the top sleeve: from the top of your armpit crack to the place where the elbow bends;
- Cut four pieces of fabric:
- a front and a back:
the length is measured in the step#1 (add 2” if your boobies are big 😉 ) plus 2” for hem allowances;
the width is your chest size multiplied by 2; - two sleeves:
the length is measured in the step#1 plus 2” for hem allowances;
the width is 25”;
- a front and a back:
- Put the sleeves together and put the front and back together;
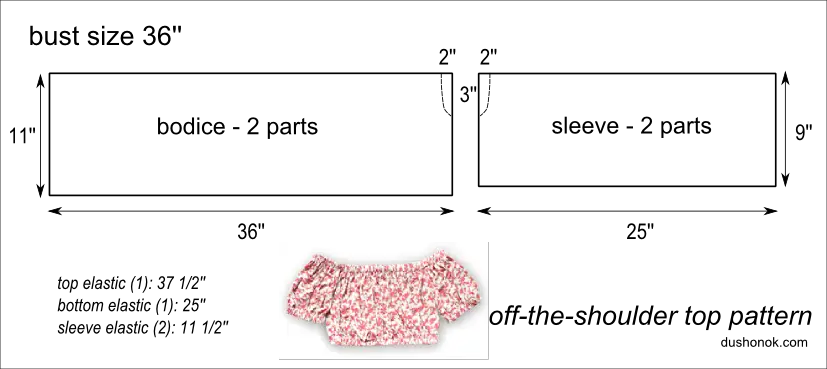
cut out two symmetric armholes: the width is 2”, the length is 3”;
if it looks too complicated see the top pattern below; - Sew the sleeve seams;
- Sew the front and back side seams;
- Sew in the sleeve armhole into the bodice armhole;
- Fold the top of the bodice inward according to the width of your elastic and sew it – do not forget to leave an opening to insert the elastic!
- Hem the bottom of the bodice and the sleeve ends the same way we did in the previous step;
- Cut 4 pieces of the elastic band (top, bottom, two sleeves) according to your measurements (measure around your shoulders, around your chest under the boobies and around the arms);
Attach the safety pin to one end of an elastic and thread it through until it appears on the other end; - Sew the elastic ends together and adjust the gathered fabric.
And now… Wear it!
Off-The-Shoulder Top Pattern
Here is the pattern you can use as a reference or as is if your size equals mine.
The Best Thing About My Top
The best thing about my top is that I can lift my arms and bring them down… and guess what – the top doesn’t break! And stays in place! Isn’t it great!

So guys, what do you think about my DIY?
Disclaimer: Yup, this post may contain affiliate links! If you buy something from me, I get some margarita money (not enough to buy a pair of shoes). Read more here.





Is there a video tutorial?
Hi! i know this post was forever ago but I was wondering whether for the pattern I’m supposed to cute 2 36″ long pieces? that seems like a lot!
Hi Anna,
Thanks for your question.
I wanted the top to be puffy and that’s why I took that much. I think it was twice of my chest measurement.
You do not have to cut that much fabric, of course. 1.5 or less multiply will make it too I think.
Hope it helps!
Hi @dushonok! I’m am fairly new to sewing, and am just a bit confused by the pattern. The pictures are a little unclear and look like we are sewing the two sleeve pieces to each other?
Shouldn’t there be an armhole cut in both sides of the front/back pieces? and each sleeve sewn to each side?
Sorry if these are silly questions- trying to learn!
I really want to make this 🙂
I love this top. My sewing skills are like you said, just above “Oh I don’t know how to sew.” I might give this DIY a try. And I have totally done my share of RBF. Haha.
http://www.themultitaskingmissus.com/
hey, Gina, thanks for stopping by 🙂
You should definitely give it a try. For me the hardest part was to not get lost in all these fabric rectangles :)))) They were big and looked so alike! hehe
Yeah, I can imagine after a while they’d start to blend together. I’ll try to be careful with that, maybe I’ll write numbers in pencil on the inside of them. 🙂
good idea about writing numbers of the wrong side
Next time I may also try to attach a piece of paper to each of them indicating what’s what. Why didn’t I think about it before hehe :)))
(sorry for the late replies – for some reason your comments were marked as spam, and I rarely check the spam folder; from now on I will monitor it much more carefully)
That’s odd that they went to that folder. But, that’s okay. I’m glad that you replied anyway! 🙂
It turned out gorgeous!! And the fabric choice is beautiful! It is girly, but definitely in a good way. 😀
Also, i learned something useful: the meaning of “resting bitch face”! :))
😉
thanks for the sweet words Andreea 🙂
Amazing post dear!
http://www.bloglovin.com/blogs/printed-sea-3880191
Thanks Ira! Glad you like it 🙂
Well, I am most definitely loving the off-the-shoulder trend. You picked the perfect pattern for yours. Now if only I could sew. :]
// ▲ itsCarmen.com ▲
Carmen, thanks for stopping by and for your nice comment 🙂
I love the trend too. However I find it a bit tricky, since I have troubles finding a proper bra! So far I have simply been skipping this part of the wardrobe 🙂
I agree sewing is tricky… if only we could invent something to make it simpler!
Great! Love this article. The Grumpy cat face- awesome XD and the resting bitch face loool. You spend much time to do this article, lots of photos text etc- thanks a lot 🙂 I really want to take your tutorial in my monthly rewvies at the end of this month- is this ok for you? Best regards :-* Eva
ohh, Eva, I am so glad you liked it and appreciated the efforts 🙂 You are an experienced DIY blogger, and you know how time consuming it is.
Of course, I would be happy to see my tutorial in your monthly review! Go ahead and use it 🙂 Looking forward to read your post 🙂
I recognize that fabric 😉
😉 😉 😉 did not take me too long to use it! I love it, it is very nice! 🙂
Yay!
Really love the top!
I’ll have to have a go at making one of these!!
RBF is something so many of us have to battle with 😛
The Everyday Life of Rachel
Rachel, glad to see I am not alone in my RBF battle :))) Seriously, I make a conscious effort to keep a smile on my face heheheheee :))
Happy that you liked my post 🙂